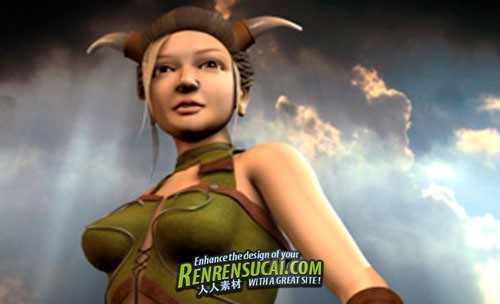
Simplymaya The Fantasy Female
In this complete project covering modeling and texturing you'll learn how to make female character models in Maya. This is mainly a sculpting tutorial where we focus on creating the female shape and facial characteristics using a NURBS, polygon and subdivision workflow.
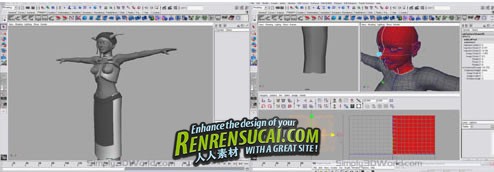
We start by making a project folder and setting up image planes before we start modeling our character where NURBS are used during the initial stages to create the different parts of the body. Our geometry is then converted to polygons and joined together through booleans operations to get one continuous mesh. Working with many of Maya's different modeling tools we gradually add detail to go from a low to high resolution mesh, making sure to keep quads and add resolution in certain areas to allow for proper joint deformation when the character is rigged and posed. The high resolution sculpting is done with subdivisions and during this process you'll learn how to covert back and forth between polygons and subdivisions while keeping your lowest base mesh intact, something that's very important in character modeling.
You'll also see how to work with the sculpt geometry tool to smooth out and get nicely rounded shapes like breasts and hips on a realistic female character model. We also make clothes with folds in the geometry that wrap nicely around the body and add a hat and boots. Working with different NURBS techniques we create the hair and spend some extra time on small details on the hands and body.
When our character is fully modeled we lay out UV's, and you'll learn how to create a complete UV set for a human body in Maya working in the UV texture editor with different mapping techniques as well as some useful tips and tricks.
We continue with texture painting which is done in Photoshop. The color maps we create are highly detailed, we start with the skin and move on to the clothes where we focus on getting nice color variation for realistic fabric textures with proper cloth structure. To further add to our character we work with bump maps to get slight imperfections in the skin and get some wear and tear on the leather boots, before we create a spec map which is used to control where we want the highlights on the skin to appear as we add lights to our scene.